Navigating the recovery timeline after a semi-permanent makeup session requires patience and precise knowledge to avoid unnecessary anxiety. Many individuals feel startled when their brow appearance shifts dramatically within the first week of healing. Understanding the specific microblading days helps you stay calm while your skin undergoes its natural biological restoration.
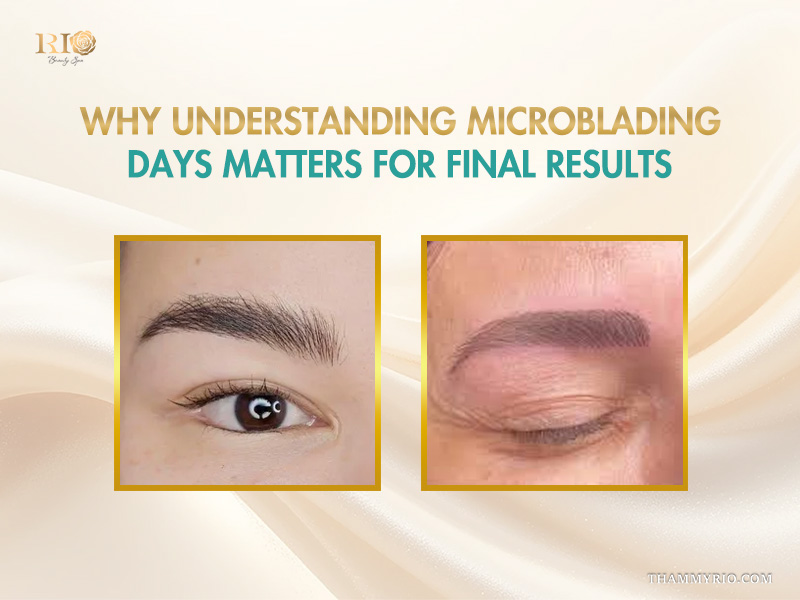
Why understanding microblading days matters for final results
The success of your eyebrow enhancement relies heavily on how well you manage the internal and external changes occurring during the recovery window. Each phase of the microblading days serves a specific purpose in locking the pigment into the dermal layer effectively. Knowledge prevents premature panic which often leads to picking at scabs or applying incorrect products that ruin the shape.
How brow skin reacts differently across microblading days
Lately, scientific observations show that skin enters an inflammatory response immediately after the procedure to protect the newly created micro-incisions. During the initial microblading days, your lymphatic system produces fluid to seal the area, creating a protective barrier against environmental contaminants. This biological defense mechanism varies in intensity depending on your specific skin type and its natural regenerative speed.
Common mistakes caused by misunderstanding microblading days
Frequent errors occur when people mistake the natural darkening of the pigment for a permanent color choice that feels too bold. Misinterpreting these microblading days often drives individuals to wash their brows aggressively or apply heavy makeup far too early. Such actions disrupt the delicate bonding process between the ink and your skin cells, resulting in patchy or faded outcomes.
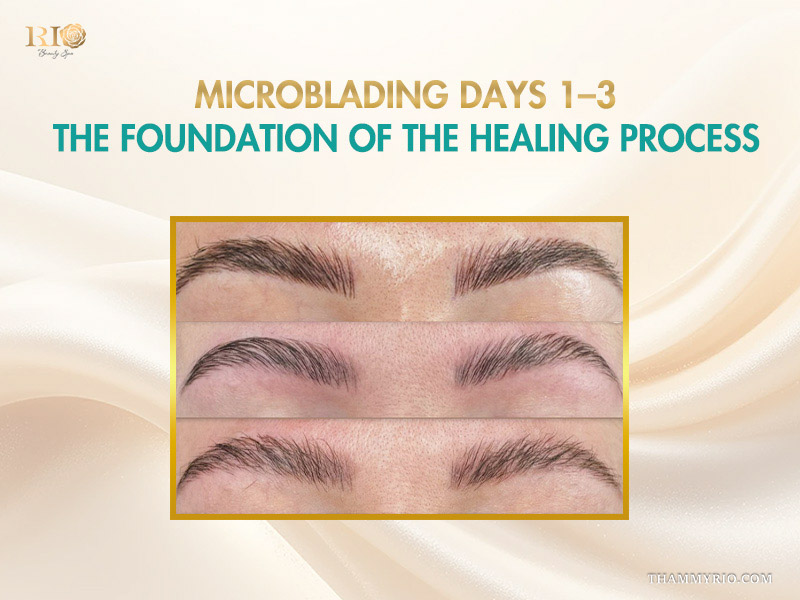
Microblading days 1–3: the foundation of the healing process
Observing the progression of microblading days allows you to appreciate the intricate craftsmanship performed by skilled artists during the early stages.
What freshly microbladed brows look and feel like
Right after the appointment, the eyebrows appear remarkably sharp and significantly darker than the intended final shade. Many clients notice slight swelling or tenderness around the brow bone as the skin begins its localized healing response. This intensity is temporary because the pigment sits on the surface before being absorbed and filtered by the deeper layers.
Proper care actions during the earliest microblading days
Hygiene remains the priority during the first seventy-two hours to prevent debris from settling into the open micro-strokes. Gently dabbing away excess lymph fluid with a sterile tissue prevents thick scabs from forming over your eye-brow shaping. Following the specific dry or wet healing instructions provided by your specialist ensures the pigment stays exactly where it was placed.
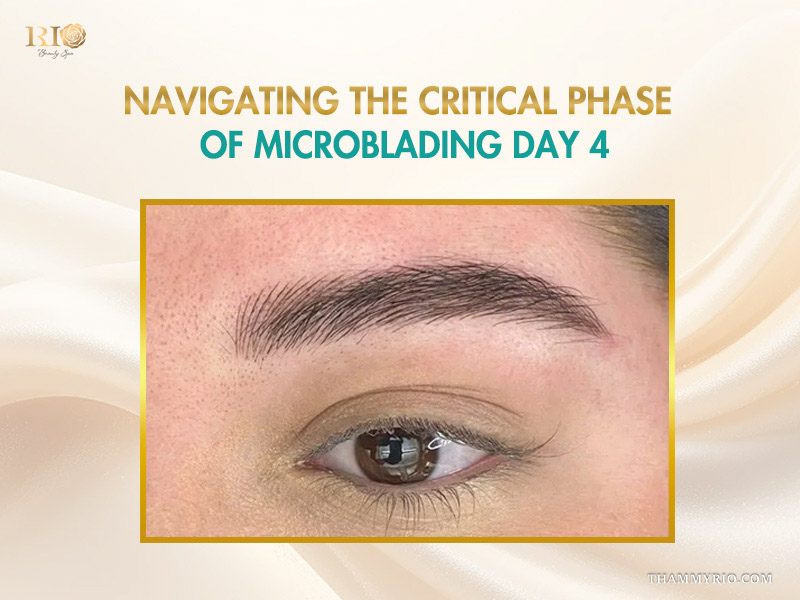
Navigating the critical phase of microblading day 4
Throughout the cycle of microblading days, the fourth day marks a pivotal transition from initial tenderness to active surface peeling.
Day 4 microblading and the beginning of surface renewal
By the time you reach microblading day 4, the top layer of the epidermis starts to tighten and feel slightly restrictive. The body begins shedding dead skin cells that were damaged during the manual stroking process to reveal new tissue underneath. Day 4 microblading stage is vital for the micro-blade eye brows technique as it indicates the “open” wounds are officially closing.
Signs on microblading day 4 that are completely normal
You might notice the color looking slightly dull or perhaps a bit “crusty” as the scabbing process solidifies. Feeling a mild tightness is standard on microblading day 4 because the skin is shrinking as it heals. These visual changes are healthy indicators that your body is successfully repairing the area without complications.
What you must know about day 5 microblading changes
Witnessing the evolution of microblading days becomes most challenging when the peeling phase reaches its peak intensity.
Why microblading day 5 often looks uneven or faded
On microblading day 5, it is common for the brows to look patchy as some flakes fall off while others remain attached. This unevenness happens because different parts of the brow heal at slightly different rates based on blood flow. The pigment underneath may seem to have disappeared entirely, but this is merely the “ghosting” effect caused by new, thick skin masking the ink.
How to handle flaking during day 5 microblading
Resistance is your best tool when day 5 microblading presents visible peeling that looks tempting to pull. Allowing the flakes to detach naturally ensures that the pigment remains trapped in the dermis instead of being ripped out prematurely. If the area feels excessively dry, a tiny amount of recommended after-microblading care ointment can provide relief without suffocating the skin.

Dealing with itching on microblading day 5
An itchy sensation is a hallmark of microblading day 5 and serves as a sign that the nerves are recovering and the skin is regenerating. Instead of scratching, which can introduce bacteria, you can gently tap the area around the brows to soothe the nerves. This discomfort usually subsides within a day or two as the primary peeling phase concludes.
What you should and should not do on day 5 microblading
Avoid all forms of moisture, including heavy sweating or steam, to prevent the scabs from softening and falling off too soon. During day 5 microblading, you must also stay away from direct sunlight and harsh chemical exfoliants that could alter the chemical composition of the ink. Stick strictly to the minimalist routine advised by your artist to maintain the integrity of the hair strokes.
Key differences between day 4 microblading and day 5 microblading
Comparing these specific microblading days reveals how rapidly the body works to restore its natural protective barrier.
Healing speed, pigment behavior, and skin response
While microblading day 4 focuses on the formation of a protective crust, microblading day 5 is characterized by the actual shedding of that layer. The pigment on day four remains relatively dark, whereas on day five, it often enters a lighter, more muted phase. This transition represents the movement of the ink from the surface into the stable layers of the skin.
Why these two microblading days are often misunderstood
Clients frequently worry that their investment is “falling off” during this specific window of the microblading days timeline. They see the flakes containing color and assume the procedure failed, which is a common misconception in the beauty industry. In reality, the skin is just discarding excess pigment that wasn’t meant to stay, leaving the permanent strokes safely underneath.
Long term microblading days and final results
Understanding the full duration of microblading days extends well beyond the first week of visible peeling.
The ghosting phase from day 7 to day 14
After the initial shedding, the brows often look very light, leading many to believe the color didn’t take. This period is a natural part of the microblading days journey where the new skin is opaque and hides the pigment below. Over the following week, the skin becomes more translucent, allowing the true color to gradually “resurface” and stabilize.
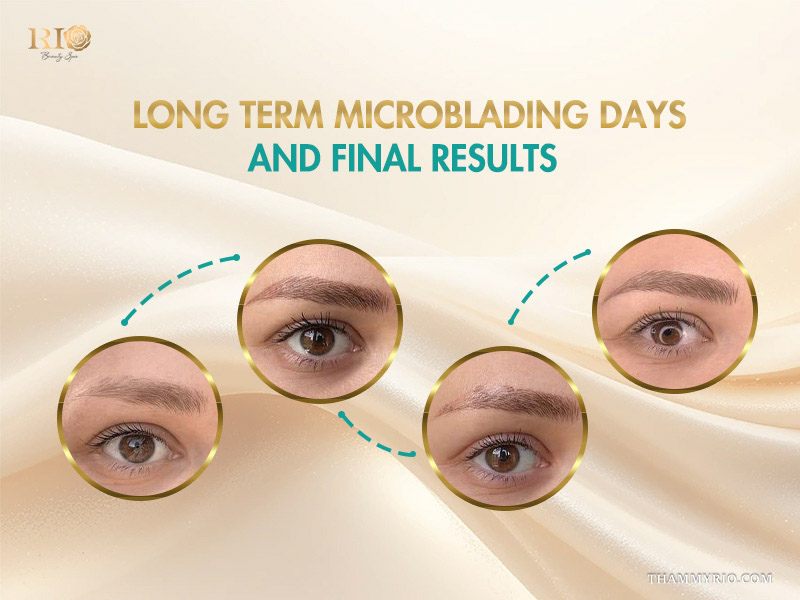
Final color reveal and the importance of touch ups
The complete cycle of microblading days concludes around week 6 to 8, when the skin is fully matured. Even with 3D microblading, some areas might retain pigment better than others depending on individual lifestyle factors. Scheduling a microblading touch up is essential to fill in any minor gaps and perfect the overall saturation for long-lasting results.
When to seek expert advice during microblading days
Monitoring your progress through the microblading days helps you distinguish between normal healing and potential issues that require attention.
Symptoms that require professional evaluation
Persistent redness that spreads, extreme swelling, or any unusual discharge are signs that you should contact your specialist. While the microblading days involve some discomfort, the pain should decrease over time rather than intensify. If you experience a fever or the area feels hot to the touch, seeking a professional opinion is a necessary safety precaution.

Why clinic experience matters during healing
Choosing a facility like Rio Beauty Clinic, with over 20 years of expertise, ensures you receive guidance based on thousands of successful cases. Expert artists understand the nuances of microblading days and can provide the reassurance and corrective advice needed for complex skin types. Their deep knowledge of permanent cosmetic eyebrows ensures your journey is smooth from the first stroke to the final heal.
Rio Beauty Clinic System
- Hotline/WhatsApp: +84 963 246 533 | +84 966 941 999
- Email: Telesale.riostudio1@gmail.com
- Instagram: tham.my.rio.beauty.clinic
- Fanpage: Rio Beauty Clinic


Có thể bạn quan tâm:
Get hybrid brows near me in Hanoi at 3 most trusted studios
Searching for hybrid brows near me in Hanoi leads to a
5 best ombre brows near me in Hanoi for stunning results
Many people search for ombre brows near me in Hanoi to
Digital microblading vs microblading which wins in 2026
Modern beauty standards evolve toward hyper-realism, making digital microblading the dominant
Powder brows after 1 year: Faded or still flawless
Searching for a long-term solution to sparse arches often leads beauty
Nano brows after 1 year: what really changes?
The evolution of your facial features often centers on the precision
Elevate your beauty routine with microblading and makeup synergy
Achieving beautiful brows involves understanding how microblading and makeup function together.